How to Build a Shipping Container Home: A Complete Guide
 Vanessa Joy
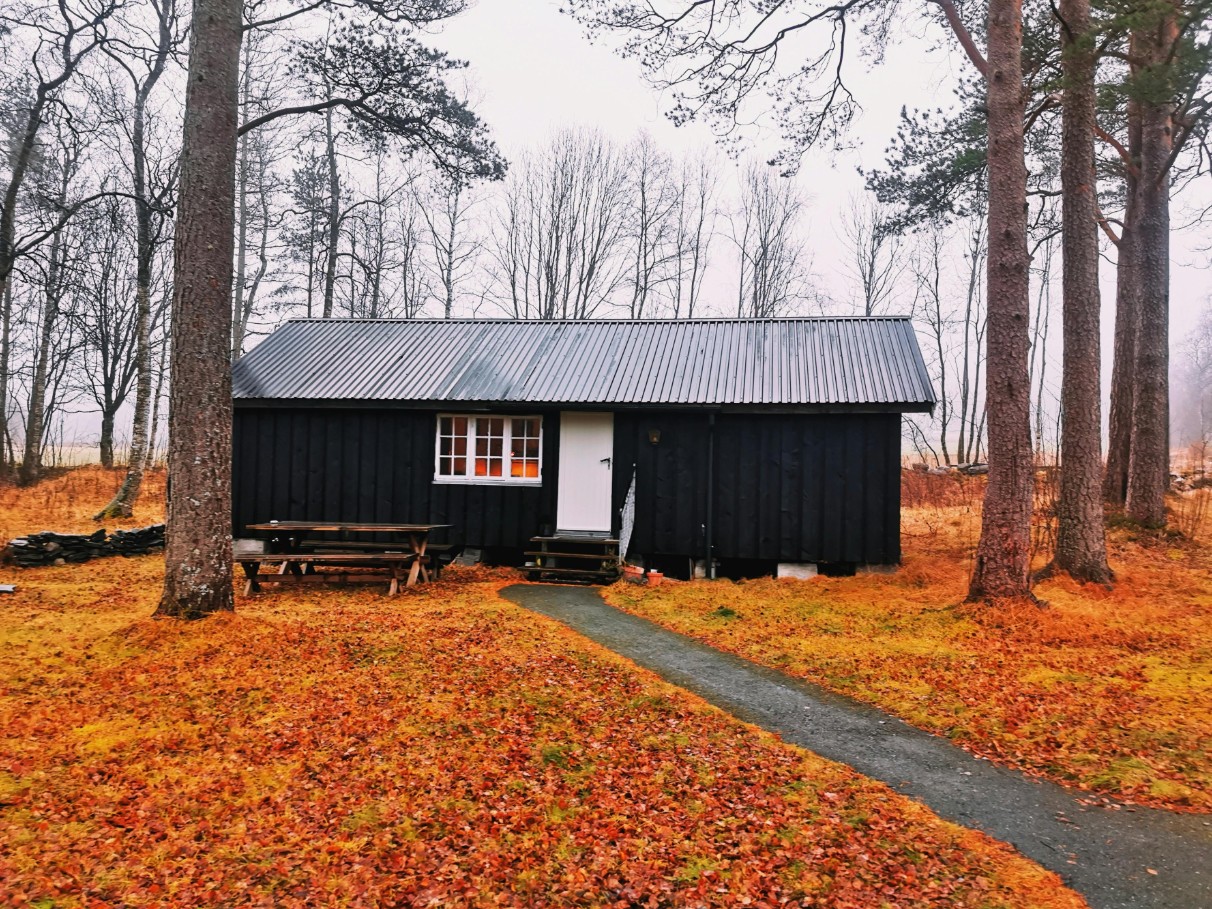
 There’s no shortage of architectural styles to consider when it comes to choosing a home. Most buyers stick with the most traditional choices, but some are looking to break away from the norm. If you love the idea of living in a home that stands out, there’s one popular trend: converting shipping containers into unique and stylish residences.
Benefits of Using Shipping Containers for Homes
Owning a shipping container home sounds like a bold choice, but some advantages are hard to ignore:
- Shipping container homes are easier on your wallet. A single 40-foot container costs around $2,500 (used) or $5,000 (new), offering a solid foundation for your home at a pleasant price.
- It doesn’t take years to build a container home, just one or two months with the right planning and expertise. The process is surprisingly manageable even for first-timers.
- You can mix and match 20-foot and 40-foot containers to craft a comfortable space. It’s even possible to stack or connect containers to add bedrooms, a second level, or even a cozy guest house.
- One of the main advantages of shipping containers is the Corten steel they’re made of: these structures endure harsh weather and years of wear and tear, especially when adding windows, patio doors, and security features.
- Life changes, and sometimes, so does your location. Unlike traditional homes stuck in one place, shipping container houses can be relocated.
- If sustainability matters to you, shipping container homes check the box. Steel is among the most recycled materials worldwide, and repurposing containers as homes are essentially upcycling on a grand scale. No need to melt them down; you’re giving new life to materials while reducing waste.
Shipping container homes don’t just mean living differently — they mean living smarter. They can be the perfect foundation for the life you want.
Main Steps to Build a Shipping Container Home
Building a shipping container home is an exciting project that promises a one-of-a-kind, stylish, and eco-friendly space. But where do you begin? This guide will help you do everything correctly.
Planning and Design
The first step is understanding what’s allowed in your area. While many parts of the U.S. welcome shipping container homes, not every city or neighborhood runs by the same playbook. Some locations have zoning restrictions or building codes with specific requirements. This means your first move is pulling together local guidelines to make sure your plan is even possible. Check whether the land you’ve chosen permits residences and confirm that container homes align with regional regulations.
Every project starts behind a desk. Before making any big purchases, including a shipping container, you need the paperwork in hand. Zoning permission, building codes, and construction approvals all need to be lined up.
If you decide to work with an architect, look for someone with experience in shipping container projects because these builds are nothing like working with traditional wood, steel, or brick structures. Your container home may be unconventional, but that doesn’t mean you can’t include features you’d find in a traditional custom home.

Choosing the Right Shipping Containers
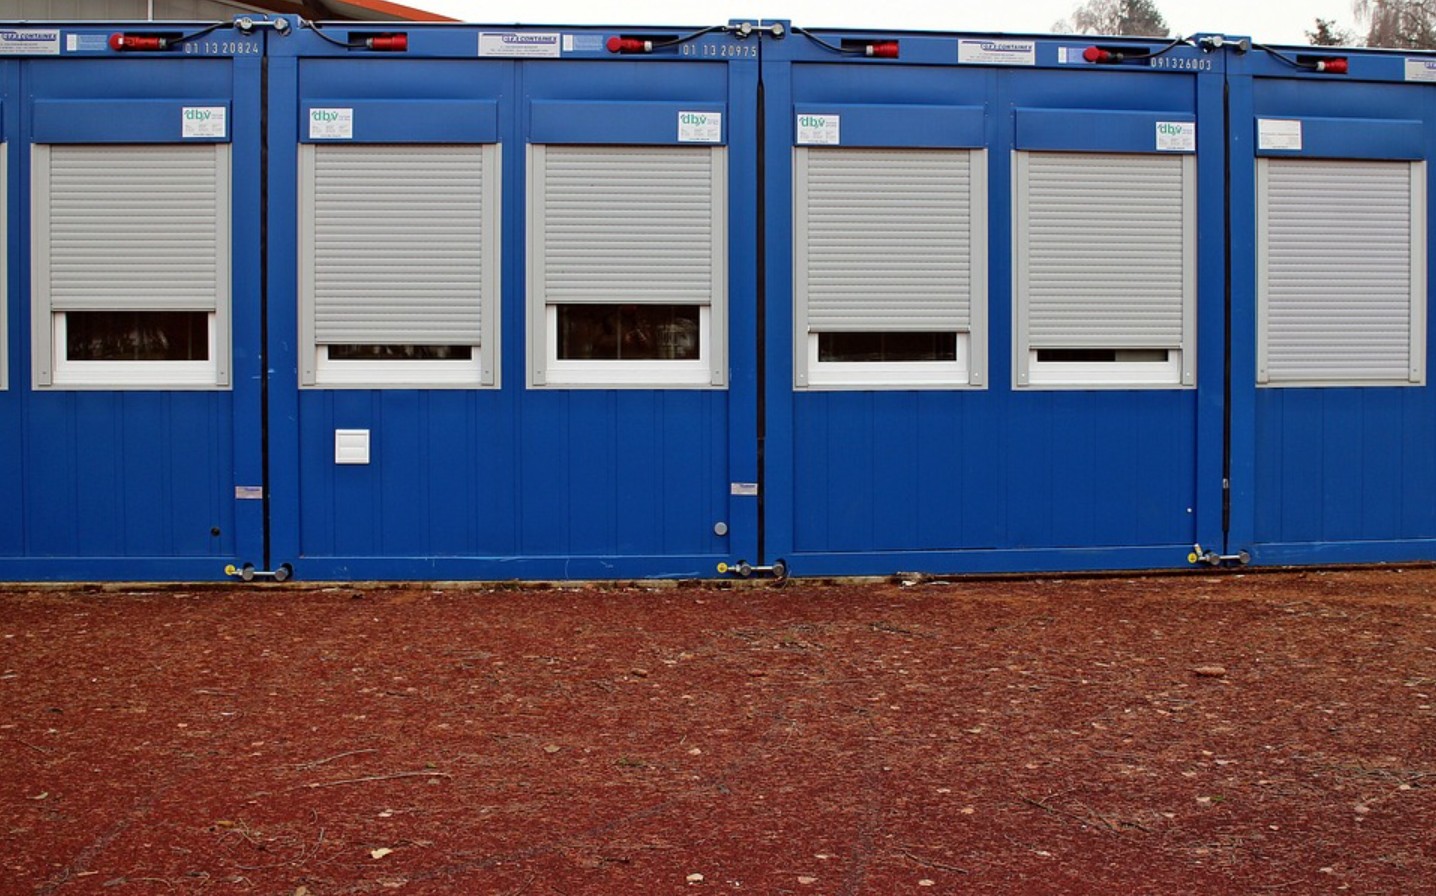
You’ve got the green light to build your shipping container home, and now it’s time to choose the right container.
A typical 40-foot high-cube container is the gold standard for container homes because it offers extra height with 9.6-foot ceilings. This gives you around 320 square feet of living space, enough for a one- or two-bedroom layout with room for a small kitchen and living area. If your design is on the simpler side, 20-foot container dimensions can work well for single-room solutions or small add-ons.
Their prices range from $2,000 to $6,000, depending on size, condition, and location, with transportation costs which add 50–75% to the price depending on how far your site is from the container depot.
Used containers often start around $3,000 for a 40-foot high cube, while new ones typically run about 50% higher. However, some used containers have a backstory. Check if they were previously used to store chemicals or hazardous goods, as you don’t want lingering toxins.
Choosing the Location
Now it’s time to turn your attention to the land where your dream home will take shape. Preparing the site is an essential part of the process, and it involves more than choosing a spot:
- Before the container arrives, you’ll need to make sure the land is ready to support your build. Clear and grade the ground to create a stable base.
- Trench for utilities like water, electricity, and sewage to prepare all the essential connections for modern living.
- Containers are heavy and require a direct, obstacle-free path for transportation, so double-check that the delivery route to your site is clear.
A solid foundation will protect your home from moisture, corrosion, and structural instability. You can choose:
- concrete piers or wooden supports for single-container homes;
- poured concrete slabs for homes with multiple containers;
- full basement for larger builds or locations prone to extreme weather.
Raising your container off the ground will protect the steel from soil moisture, which can lead to corrosion over time. Concrete piers are popular for this reason. They’re cost-effective, easy to install, and allow for a crawl space that makes repairs and modifications easier later on.
Don’t overlook the logistics of getting your cargo container onto the site. These units aren’t exactly light, and they need a direct and accessible route to avoid complications during delivery. Think about the size of the container, the path to the site, and any equipment that may be needed, like a crane or forklift, to get it positioned correctly.

Modifying the Containers
To make a steel box feel like a home, you’ll first need to cut out space for windows, doors, and ventilation to bring in natural light and improve airflow.
Map out where you want doors and windows based on your floor plan, taking into account natural light and cross-breezes, and use plasma cutters and angle grinders for clean cuts. Cutting into a container weakens its structure, so add steel reinforcements around each opening to keep your home safe and stable.
Shipping containers are strong by design, but once you start modifying them, their integrity can weaken. That’s why you should:
- Reinforce the edges around large cuts with steel beams to prevent sagging or collapse.
- Weld or bolt containers together at their corners and key points if you’re connecting two or more containers.
- In harsh climate areas, add support beams to the roof to handle extra weight.
Steel isn’t great at maintaining a comfy temperature. Without insulation, summers will feel like saunas, and winters will be unbearably cold:
- spray foam insulation fills every corner and adds a moisture barrier;
- rigid foam panels work well in milder climates and are easy to install into walls;
- sealing all cracks will keep your home well-insulated and energy-efficient.
One of the unpleasant container disadvantages is moisture buildup, which can lead to rust and mold. Proper ventilation saves the day, so do the following:
- Add roof vents to help hot, moist air escape.
- Install an HVAC system.
- Position doors and windows to create natural ventilation patterns and keep air circulating.
After all the heavy lifting is done, it’s time to make the space your own:
- Replace the original container floors (especially if treated with chemicals) with hardwood, laminate, polished concrete, or other options.
- Cover up the steel walls with drywall, wood paneling, or colorful paint.
- Protect your container from rust with weatherproof paint in your favorite shade.
Every weld, cut, and coat of paint brings your shipping container closer to becoming a livable and welcoming home.
Installing Utilities and Systems
Indispensable utilities and systems include:
- plumbing;
- electrical wiring;
- heating and cooling systems;
- water management.
Plumbing is the backbone of any home, and the same holds for your shipping container. This guide will help you keep water flowing where it’s needed:
- Create a smart layout: place kitchens, bathrooms, and laundry areas close together to cut down on pipework.
- Choose between PVC or PEX pipes.
- Focus on drainage and venting to keep your drains flowing smoothly.
- Connect to a water source if you have municipal water access; otherwise, consider a rainwater collection system.
- Install a compact water heater.
To install an efficient electrical system, do the following:
- Design a power layout with appliances, outlets, and lights.
- Work with insulated hardware since steel conducts electricity.
- Frame your walls to hide wiring and protect it from damage.
- Set up a breaker panel to manage circuits and ensure electrical safety.
- If you use solar panels, install an inverter and battery to store and convert power.
What about heating and cooling systems, cargo containers are surprisingly uncooperative when it comes to temperature, so you need to make them more livable:
- Install a mini-split HVAC system.
- Focus on insulation first to keep cold air out in winter and hot air out in summer.
- Improve airflow with fans to add circulation and control moisture.
Then, manage water systems:
- Set up gutters and collection barrels to catch rain for household use or gardening.
- Create a recycling system that uses water from sinks or showers for flushing toilets or irrigation.
- Protect your foundation by channeling water away from the base of the container.
Get the necessary permits when installing utilities because many jurisdictions require electrical, plumbing, and HVAC work to comply with local building codes.

Safety Considerations
There’s a lot to consider to make your container home secure.
First of all, shipping containers are tough, but cutting into steel for doors or windows can weaken them. Add steel beams or frames around any cuts you make for windows and doors to prevent sagging or collapsing over time. If you want to add a rooftop deck, reinforce the roof with additional support to handle the weight safely.
“Steel doesn’t burn” might be true, but what’s inside your container home can. Invest in fire safety to protect your space and your loved ones. When choosing insulation, use fire-resistant materials like mineral wool. Install smoke alarms in the kitchen and bedrooms and regularly test them to make sure they’re ready when you need them. Prepare emergency exits in every room.
Don’t forget about ventilation. Without it, you risk trapped moisture and even dangerous gases. Install roof vents and HVAC systems, but don’t over-insulate to avoid mold and rust.
Decorating and Furnishing the Container Home
Decorating and furnishing your container home is the most pleasant step as you can add personal accents.
First, you should use space wisely because a shipping container doesn’t come with extra square footage to spare. Use the height of your container to your advantage. Install shelves, hanging storage, or even wall-mounted desks to keep your floor space open and clutter-free. You can also take advantage of built-in solutions like a bed frame with drawers underneath or a staircase with hidden compartments.
Create “rooms” within the open container space. Place a rug under the couch to signal the living area or use a bookshelf as a divider between your sleeping and working spaces. Instead of a bed, buy a sofa: by day, it’s seating; by night, it’s a comfy place to rest. In a kitchen zone, install folding or wall-mounted tables.
What about coloring, whites, pastels, and soft neutrals beautifully reflect light and give the illusion of a larger space, but you can incorporate pops of color in pillows, artwork, or small pieces of furniture.
Lighting is one of the easiest ways to make a small area feel expansive. Mix natural light, functional lighting, and mood lighting: install large windows or glass doors, layer ceiling lights, floor lamps, and task lighting, and use LED strips under cabinets or along shelving.
And then, add a dash of you: hang some of your favorite pieces of art, throw blankets, cushions, and rugs to warm up the space, bring in plants, and dedicate a small shelf or wall to travel souvenirs, favorite photos, or small meaningful objects.
Final Inspection and Moving-in
Before moving in, you’ll need to ensure your container home passes all necessary inspections:
- double-check that all wiring is complete, outlets work and the breaker panel is up to code;
- run water through all your faucets and flush the toilet to see if everything drains properly;
- test your heating, cooling, and ventilation systems to make sure they’re in working order;
- walk around your home, both inside and out, to look for any signs of damage, rust, or weaknesses;
- have all your permits on hand and ensure every part of your build has been signed off by local authorities;
- clean walls, windows, counters, and floors with appropriate cleaners;
- open windows and doors to circulate fresh air throughout the space;
- confirm your home is sealed to keep pests out.
Because container homes often have limited space, only bring what you need and check the dimensions to ensure the furniture fits comfortably.
Spend a few weeks living in the space to learn what works and what needs tweaking. Don’t be afraid to rearrange furniture or add extra storage if needed.
And finally, host a housewarming party — share your hard work and unique space with family and friends. After all, how often does someone get to say, “I live in a shipping container home?”
Conclusions
Don’t consider a shipping container a shelter — it’s the start of a fresh chapter filled with possibilities. Congratulations on building a story you can live with every day. Enjoy the fruits of your labor and be proud of what you’ve created.
How much does it cost to turn a shipping container into a home?
The price of a basic model starts at $10,000 and goes up to $100,000 or more for unique designs, depending on insulation, plumbing, finishing, and permits.
What are the advantages and disadvantages of using a shipping container to build a home?
Shipping container homes are budget-friendly, durable, eco-conscious, and quick to construct, but limited space, insulation needs, and potential zoning challenges are the main disadvantages.
How long will a shipping container home last?
A well-built container house may endure 25 years or more with the right care and regular maintenance.
What do I need to know before building a shipping container home?
Research local construction codes and permit requirements, choose a high-quality container, plan for solid insulation and ventilation, and budget for structural changes, utilities, and landscaping.
Where do I start when building a container home?
Sketch your ideas, set a realistic budget, secure permits, and prepare your site. Then, buy a quality container and hire professionals (if needed) for insulation, wiring, and plumbing. Remember that converting a container into a cozy home should be step-by-step.